The Ultimate Guide to MTB Trails in California: Top 10 Nightfox Team Picks
California is a paradise for mountain bikers, offering some of the most thrilling and scenic trails in the world. Whether you prefer steep descents, forest singletrack, or coastal rides, this state has something for every riding style.
We at Nightfox have teamed up with MTB riders across California to compile the ultimate list of top 10 trails, chosen by teams who have trusted us for their custom-made jerseys since 2012. Here’s a look at the best MTB experiences California has to offer:
Downieville Downhill – Sierra County
Laguna Coast Wilderness Park – Orange County
Escondido Falls Trail – Malibu
Westridge Singletrack Loop – Santa Monica
Los Peñasquitos Canyon – San Diego
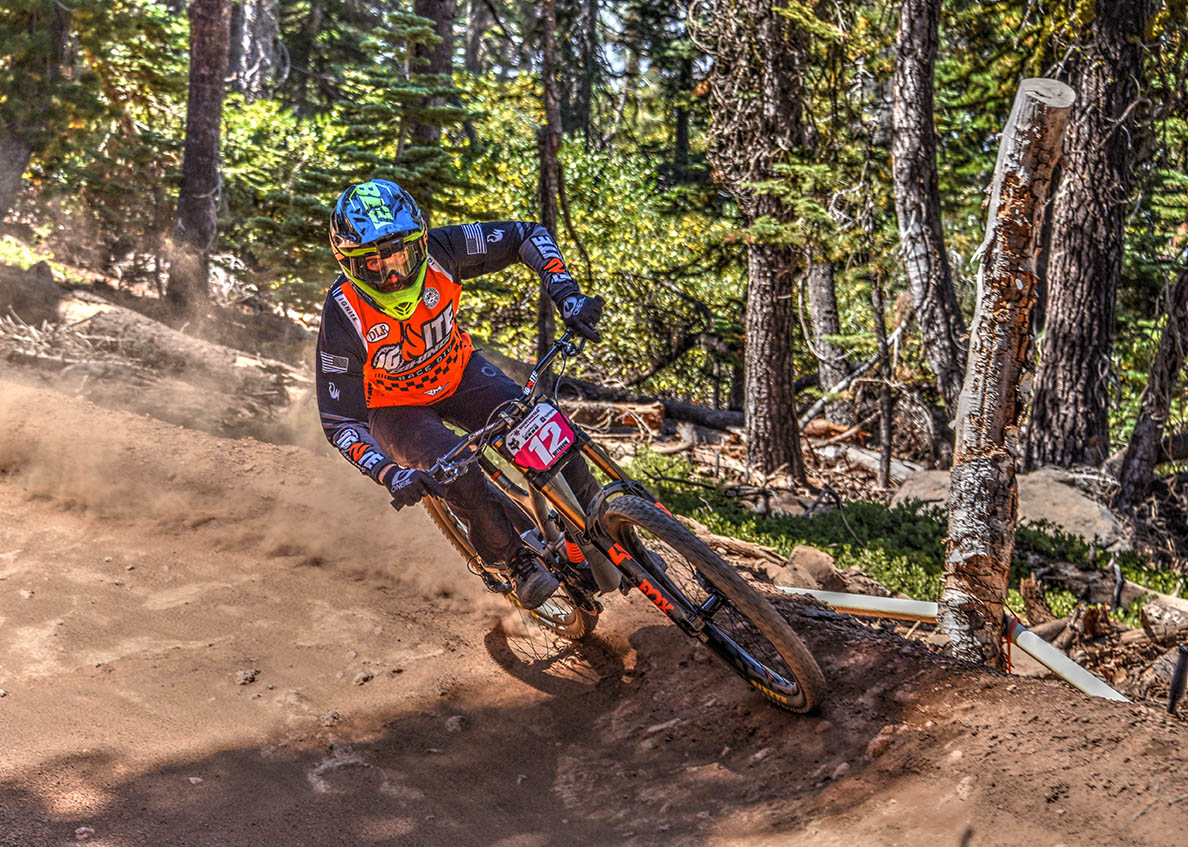
1. Downieville Downhill – Sierra County
Difficulty: Advanced
Distance: 15 miles
Elevation Loss: 4,000 feet
Trail Overview: Downieville Downhill is widely regarded as one of the most iconic downhill trails in the United States. Located in Sierra County, this 15-mile ride is perfect for advanced riders looking for a long, adrenaline-packed adventure. Starting at an elevation of 7,000 feet and dropping a staggering 4,000 feet, the trail offers a thrilling combination of fast-flowing singletrack, rocky descents, and technical sections.
The trail winds through diverse terrain, including alpine forests, creek crossings, and exposed ridgelines, offering stunning views of the Sierra Nevada mountains. The blend of tight switchbacks, steep drops, and loose rocky paths demands both skill and focus.
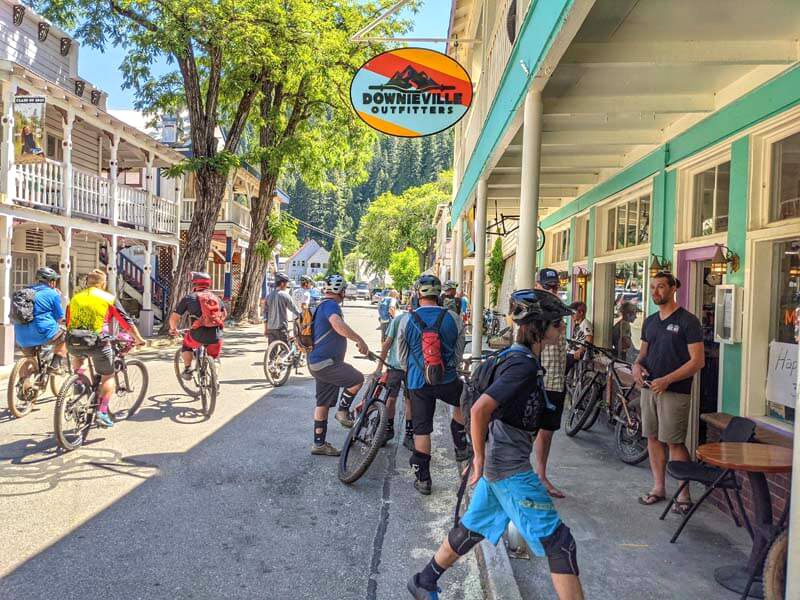
What to Expect
Technical Features: Downieville Downhill is loaded with natural obstacles, such as rock gardens, loose shale, and tree roots, making it a challenging yet exhilarating ride. You’ll encounter a mix of sharp, technical corners and open, flowing sections where you can really build speed.
Varied Terrain: Riders are treated to everything from smooth, high-speed sections to tight, technical terrain with narrow passages between trees. You’ll need sharp handling skills to navigate the changing surfaces and elevation shifts.
Scenery: As much as the trail is known for its technical difficulty, it also offers breathtaking vistas, especially as you descend from alpine ridges to lower elevations. Take a moment to enjoy views of deep valleys, rugged mountain ranges, and flowing rivers that cut through the landscape.
Pro Tips
Be Prepared for Changing Conditions: The trail’s elevation changes mean you’ll experience different climates and weather patterns. Start in the cool alpine air, but as you descend, it can get considerably warmer, so pack layers accordingly. In early summer, expect possible snow patches at the top.
Bring Extra Water and Snacks: The trail takes a few hours to complete, and hydration is key, especially as temperatures rise at lower elevations. Consider using a hydration pack and bring energy snacks to keep your stamina up.
Bike Setup: Make sure your bike is ready for some serious downhill action. Full-suspension bikes with good travel (150-170mm) are ideal for absorbing the impacts from the rocky terrain. Check your brakes and suspension before the ride—this trail is tough on gear.
Shuttle Service: Many riders take advantage of the local shuttle services that transport you to the top of the trail, saving your legs for the descent. Reserve your spot early, especially during peak season, as shuttles fill up quickly.
Safety Gear: Given the technical difficulty, it’s strongly recommended to wear a full-face helmet, knee and elbow pads, and gloves. This trail is intense, and proper protective gear is essential.
Rider Experience
Downieville Downhill offers a blend of heart-pumping action and rewarding scenery that’s hard to beat. Advanced riders love it for its variety, flow, and the pure excitement of descending for miles. If you’re looking for a trail that pushes your skills to the limit while offering incredible views, Downieville is a must-ride.
The Birthplace of Mountain Biking and Home to Iconic Trails
Did you know that California’s mountain biking scene dates back to the 1970s, when Marin County became the birthplace of the sport? Enthusiasts began modifying cruiser bikes to tackle the rugged terrain of Mount Tamalpais, leading to the creation of the first off-road bicycles, known as “klunkers.” This innovation sparked the development of modern mountain biking, and today, California is home to some of the most iconic MTB trails in the world, from the legendary Downieville Downhill to the scenic singletracks of Santa Cruz. The state’s diverse landscapes offer endless opportunities for riders to experience the roots of the sport.
2. Laguna Coast Wilderness Park – Orange County
Difficulty: Intermediate
Distance: Varies (up to 13 miles)
Elevation Gain: 500-1,200 feet, depending on the route
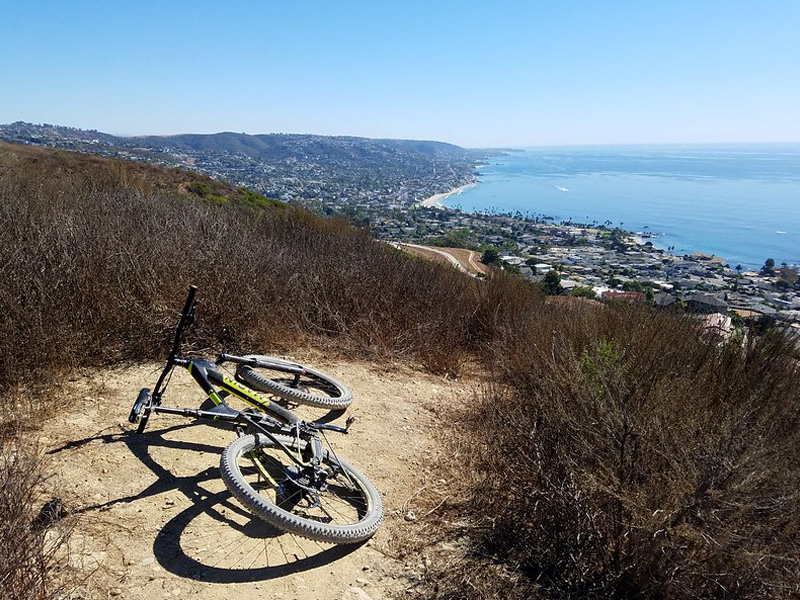
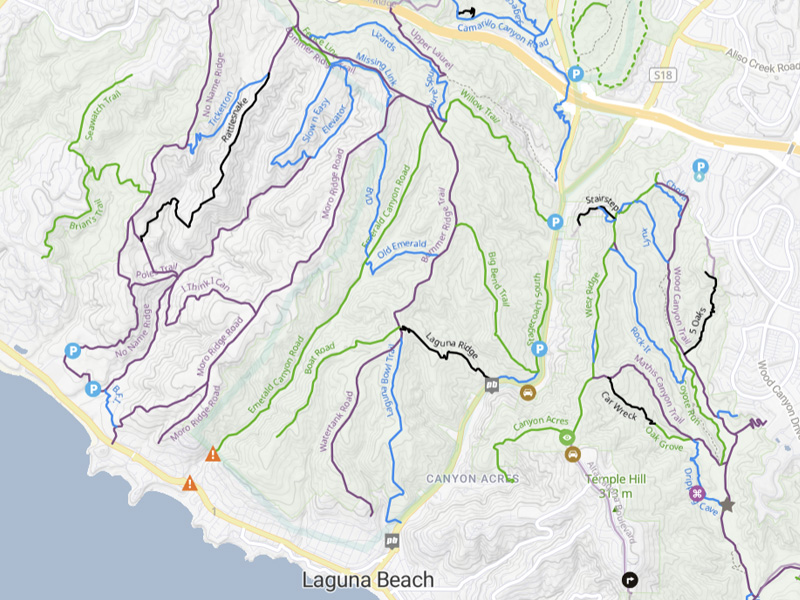
Trail Overview: Laguna Coast Wilderness Park is a hidden gem for mountain bikers in Southern California, offering a diverse trail network that combines the beauty of coastal landscapes with technical riding challenges. Situated in the hills above Laguna Beach, this park provides an excellent playground for intermediate riders looking for a mix of flowy singletrack, rocky descents, and moderate climbs.
With trails varying from shorter loops to longer 13-mile rides, Laguna Coast offers something for everyone, whether you’re looking for a quick ride after work or a longer weekend adventure. The area is renowned for its natural beauty, featuring coastal sage scrub, oak woodlands, and expansive views of the Pacific Ocean.
What to Expect
Technical Features: Laguna Coast offers a combination of flowy trails and more technical sections with rocky descents and sharp switchbacks. While it doesn’t have the extreme features found on advanced trails, there are enough tricky spots, loose rocks, and challenging climbs to keep intermediate riders engaged.
Rolling Terrain: Riders will experience rolling hills, which means plenty of climbs and descents. Some trails feature long, gradual climbs, while others have short, steep sections that will test your stamina. Be prepared for a lot of up-and-down riding, with most trails offering a rewarding downhill flow after the climbs.
Scenic Overlooks: One of the highlights of Laguna Coast Wilderness Park is the breathtaking views. On clear days, you’ll have expansive vistas of the Pacific Ocean, Laguna Beach, and even Catalina Island in the distance. It’s a perfect spot to pause, catch your breath, and take in the surroundings.
Wildlife Sightings: The park is home to an array of wildlife, and it’s common to spot deer, rabbits, and various bird species along the trails. Keep an eye out for animals, especially in the early morning or late afternoon, when they’re more active. Just be mindful of your speed and surroundings to avoid any sudden encounters.
Pro Tips
Pick Your Route Based on Your Fitness Level: With up to 13 miles of trails, Laguna Coast offers a variety of options. If you’re up for a challenge, try one of the longer loops like the Bommer Ridge to Laguna Ridge or Big Bend routes, which feature a mix of climbs and flowing descents. For a shorter, less strenuous ride, Laurel Canyon offers a great loop with scenic views.
Time Your Ride for the Best Views: If you’re chasing those stunning coastal views, plan your ride for early morning or late afternoon. Not only will you avoid the midday heat, but the sun will cast a golden glow over the ocean, making for a picture-perfect backdrop as you ride.
Trail Conditions Can Vary: During the dry summer months, expect the trails to be loose and dusty, which can make the descents tricky. In the winter or after rains, the trails firm up and become more tacky, offering better traction for faster rides. Always check trail conditions before heading out.
Bring Plenty of Water: The park can get hot, especially during the summer, and shade is limited. Make sure to pack extra water and perhaps a few snacks, as the combination of climbs and heat can drain your energy quickly. A hydration pack is ideal for longer rides.
Rider Experience
Laguna Coast Wilderness Park offers an enjoyable balance of challenge and reward for intermediate riders. The rolling hills provide enough climbing to work up a sweat, while the descents are fun and fast without being overly technical. It’s the perfect spot for riders looking to improve their skills and enjoy some of the best coastal views Southern California has to offer.
3. Mission Peak Loop – Fremont
Difficulty: Intermediate to Advanced
Distance: 6 miles
Elevation Gain: 2,000+ feet
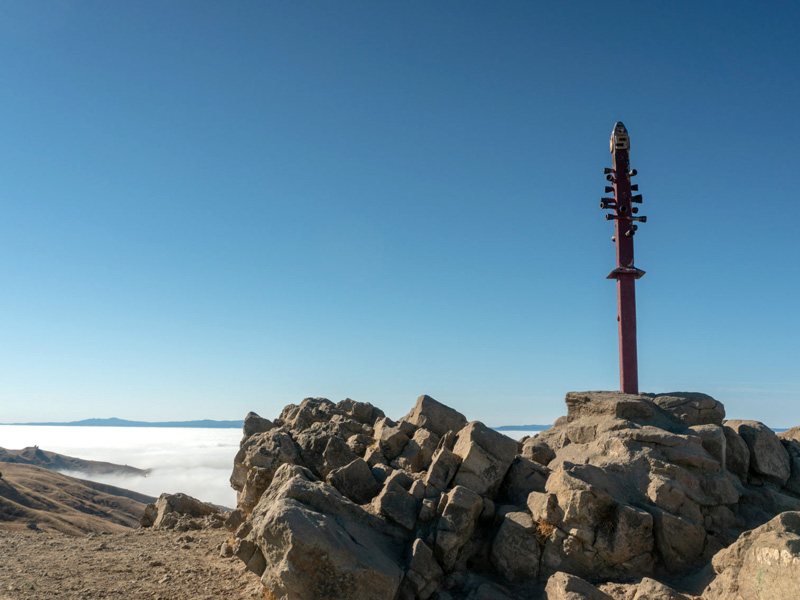
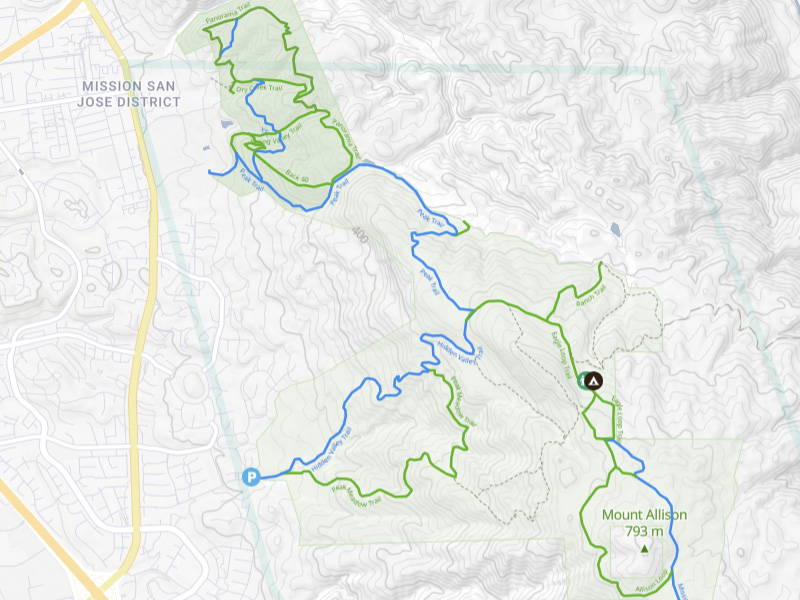
Trail Overview: The Mission Peak Loop is one of the most challenging and rewarding rides in the Bay Area, especially for riders seeking to test both their physical fitness and technical skills. This trail, located in Fremont, is known for its tough ascents, stunning 360-degree summit views, and exhilarating descents. The loop covers a relatively short distance of 6 miles, but don’t let that fool you—the elevation gain and technical sections make this trail feel longer and more demanding.
Starting at the Stanford Avenue trailhead, the climb to the summit of Mission Peak is a relentless grind, gaining over 2,000 feet in elevation over just a few miles. Once you reach the top, however, you’re rewarded with panoramic views of the Bay Area, making the effort well worth it. The descent is fast and fun, with sections of flowy singletrack and some technical switchbacks that will test your handling skills.
What to Expect
Challenging Climbs: The ascent is what makes Mission Peak famous (or infamous) among local riders. The trail is a continuous climb with steep grades that will push your legs and lungs to the limit. Riders need to pace themselves on this section, as there are few places to rest once you’re on the climb. The terrain includes fire roads and rocky paths, with loose gravel in some areas making it even more challenging.
Summit Views: One of the biggest rewards of tackling the Mission Peak Loop is the stunning summit. From the top, you can take in breathtaking views of the entire Bay Area, including San Francisco, the East Bay, and even the Sierra Nevada on clear days. It’s a great spot to take a break and snap some photos before beginning your descent.
Flowy and Technical Descent: While the climb is demanding, the descent is where the fun begins. The return route offers fast, flowy sections of singletrack where you can let loose, but be prepared for technical sections that require precise bike handling. There are switchbacks, loose rocks, and steep drop-offs that require full attention. The trail can be narrow in places, so advanced riders will feel right at home, while intermediates should proceed with caution and skill.
Crowded on Weekends: Due to its popularity, the Mission Peak Loop can get crowded on weekends, especially with hikers. Early morning rides are recommended if you want to avoid foot traffic, and be prepared to yield to hikers, especially on the way down. It’s a good idea to have a bell on your bike to alert others on the trail.
Pro Tips
Time Your Ride for the Best Conditions: Mission Peak is best tackled in the early morning or late afternoon, especially during the warmer months. Temperatures can soar midday, and the lack of tree cover can make the climb grueling in the heat. Early rides also give you a better chance to enjoy the summit without crowds.
Bring Proper Gear: Full-suspension bikes are recommended for the rocky and technical sections of the descent. A dropper post can also be helpful for the switchbacks. Since there’s a mix of smooth and rough terrain, having versatile tires that offer both good rolling resistance and grip will make the ride more enjoyable.
Watch for Wildlife: Mission Peak is home to a variety of wildlife, including hawks, deer, and the occasional coyote. While it’s a stunning area to ride, be mindful of animals crossing the trail, particularly in the early morning or evening.
Rider Experience
Mission Peak Loop is not a ride for the faint of heart, but for those who love a good challenge, it’s one of the most rewarding experiences in the Bay Area. The climb is tough, but it serves as excellent endurance training for advanced riders. The descent, with its mix of flowy sections and technical challenges, is the payoff for all that hard work. Intermediate riders can also tackle this loop, but should be comfortable with steep, sustained climbs and confident in their ability to handle technical terrain on the descent.
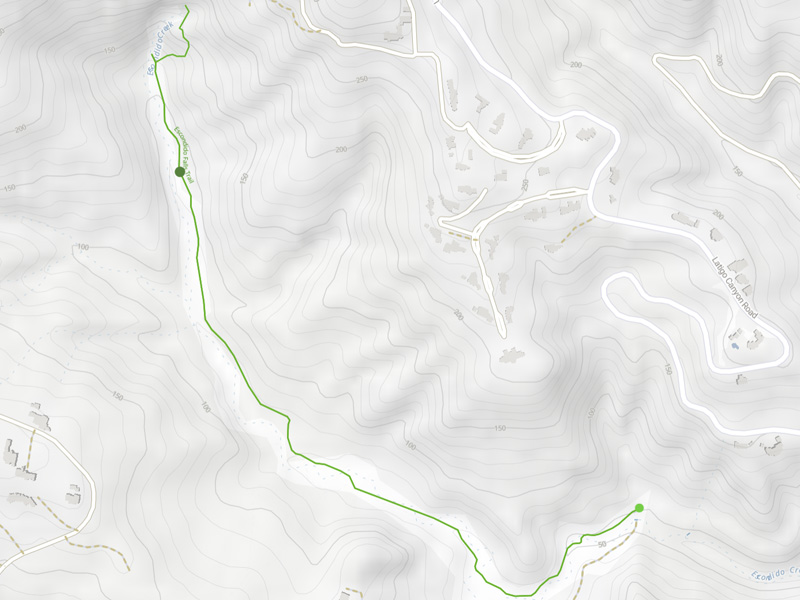
4. Escondido Falls Trail – Malibu
Difficulty: Intermediate
Distance: 4 miles (out and back)
Elevation Gain: Approx. 400 feet
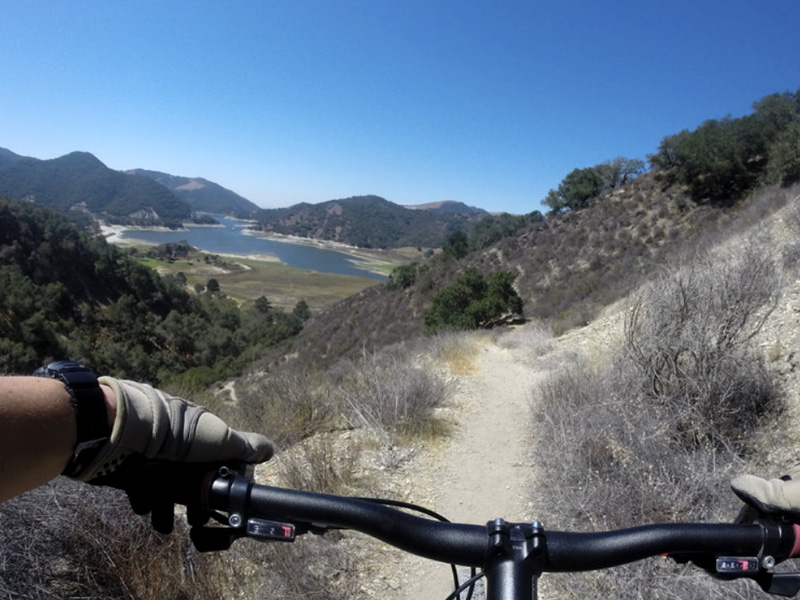
Trail Overview: The Escondido Falls Trail in Malibu is a hidden gem for mountain bikers who crave a combination of scenic beauty and technical singletrack. Nestled in the Santa Monica Mountains, this trail offers a short but memorable ride that blends rugged terrain with breathtaking coastal views. The main attraction is Escondido Falls, one of Southern California’s tallest waterfalls, which adds a unique element to this MTB experience.
Though the ride is relatively short at just 4 miles, the trail features moderate climbs, rocky sections, and technical features that keep intermediate riders engaged throughout the journey. Escondido Falls Trail is perfect for those looking to escape the hustle of the city and immerse themselves in nature while enjoying a fun and challenging ride.
What to Expect
Technical Singletrack: The trail features a combination of smooth and rocky singletrack that will test your bike-handling skills. There are several tight corners and rocky sections where riders need to be mindful of their lines. The trail is narrow in spots, with sharp turns that require quick reflexes. It’s a technical ride, but one that intermediate riders should be able to handle with confidence.
Moderate Climbs and Descents: While the elevation gain is modest at around 400 feet, the climbs on the trail can feel steeper due to the rocky and sometimes loose terrain. Riders will find the ascents challenging but manageable, with several short, punchy climbs that get the heart rate up. The descents, though not long, are fun and flowy with technical features that will keep you on your toes.
Escondido Falls – The Highlight: The true gem of this trail is Escondido Falls. At over 150 feet, this multi-tiered waterfall is the tallest in the Santa Monica Mountains. While the water flow is seasonal, it’s always a beautiful sight and provides a perfect backdrop for a mid-ride break. The trail takes you through lush, shaded areas as you approach the falls, creating a serene escape from the rugged terrain.
Scenic Coastal Views: Along the way, you’ll be treated to stunning views of the Pacific Ocean and Malibu’s rolling hills. The mix of coastal scenery and mountain landscape makes this ride truly unique. Riders can enjoy panoramic views during their climb, which helps distract from the effort of pedaling uphill!
Pro Tips
Plan for Seasonal Variations: Escondido Falls is best experienced after winter rains when the waterfall is flowing at its peak. In the drier months, the water flow can be reduced to a trickle, so if the falls are your main draw, plan your visit accordingly. Even without the waterfall in full flow, the trail is still a great ride, but the falls add that extra wow factor.
Tire Selection: Given the mix of terrain, having a set of tires that provide good grip on rocky sections while still rolling efficiently on smoother parts is key. Tubeless tires with lower pressure will help absorb some of the bumps and provide better traction, especially on the rocky climbs.
Watch for Hikers: The Escondido Falls Trail is a popular hiking spot, so expect to encounter foot traffic, especially on weekends. Keep your speed in check and always yield to hikers on narrow sections of the trail. A friendly bell on your bike can be helpful in letting people know you’re coming.
Parking and Trail Access: There’s limited parking near the trailhead, so it’s wise to arrive early, particularly on weekends. Parking is typically available along Winding Way, but be prepared for a short ride up to the actual trailhead. The beginning of the trail is a bit more exposed, so sunscreen is a must on sunny days.
Hydrate and Pack Snacks: Though the trail isn’t long, the climbs and rugged terrain can be draining. Bring enough water to stay hydrated, as there are no refill stations along the way. Packing a small snack to enjoy at the falls is a great way to recharge before heading back down.
Rider Experience
Escondido Falls Trail is a great ride for intermediate mountain bikers looking to blend technical singletrack with stunning natural scenery. The rocky terrain and moderate climbs offer a good challenge, while the coastal views and the beauty of the falls provide a sense of adventure and reward. It’s also an ideal ride for those who want a shorter, more compact trail experience that packs plenty of punch.
From Gold Rush Wagon Trail to MTB Icon
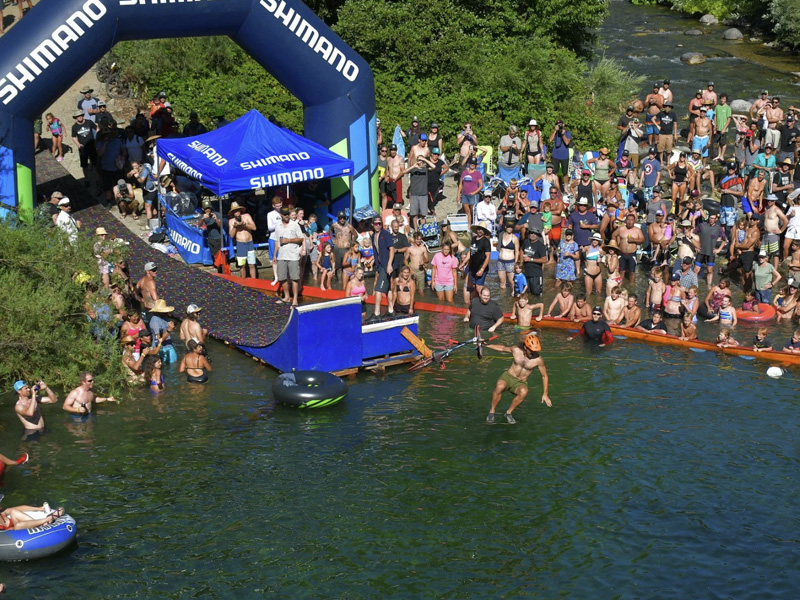
Did you know that the Downieville Downhill in California is one of the longest and most famous MTB descents in the U.S.? Originally built during the Gold Rush era as a wagon trail, it now serves as a 15-mile, 4,000-foot descent that challenges even the most experienced riders. This iconic trail is a key part of the Downieville Classic, one of the most celebrated mountain biking races, attracting riders from around the world to experience its rugged terrain and stunning Sierra Nevada scenery.
5. Mt. Wilson Trail – Pasadena
Difficulty: Advanced
Distance: 14 miles (out-and-back)
Elevation Gain: Approx. 4,500 feet
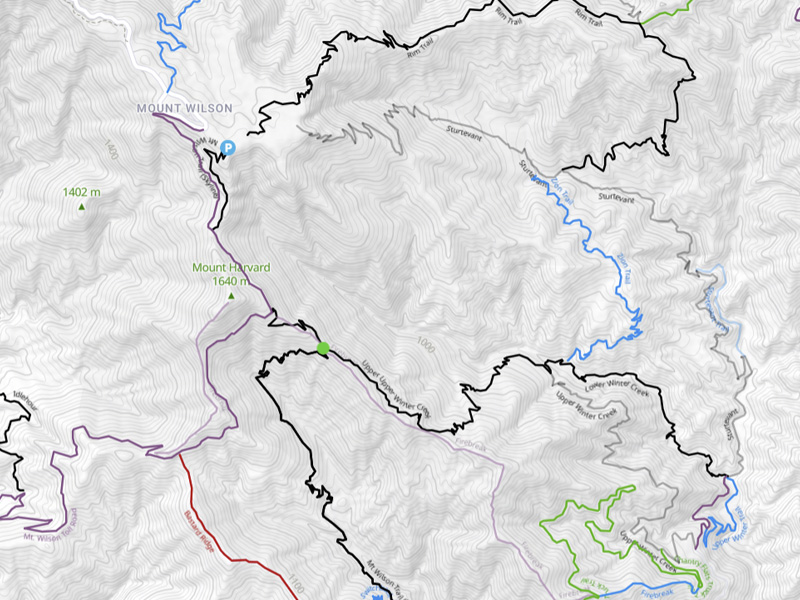
Trail Overview: The Mt. Wilson Trail in Pasadena is one of Southern California’s most challenging and exhilarating mountain biking experiences. Nestled in the rugged San Gabriel Mountains, this trail offers a serious test of endurance, technical skill, and mental focus. It’s not for the faint of heart—advanced riders will find themselves climbing relentlessly for 7 miles before being rewarded with a high-speed, technical descent that’s as thrilling as it is demanding.
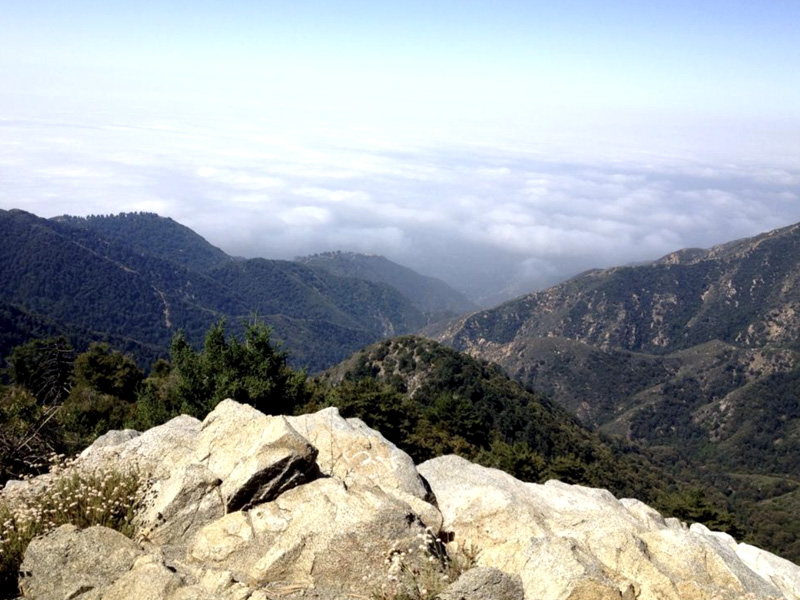
The trail’s panoramic views of the Los Angeles basin, combined with its steep switchbacks and rugged, rocky terrain, make this an iconic ride for expert riders looking to push their limits. Mt. Wilson is not just a ride; it’s an adventure, and every mile comes with its own unique set of challenges.
What to Expect
Relentless Climbing: The first half of the trail is a grueling 7-mile climb that will push your legs and lungs to the brink. Starting at the base in Pasadena, the elevation gain is over 4,500 feet, with a mixture of steep, sustained grades and switchbacks that demand strong climbing skills. The climb itself is scenic but unrelenting, with rocky sections, loose gravel, and narrow paths in parts, so be prepared for a slow, steady grind.
Technical Descent: After reaching the summit, you’re rewarded with an exhilarating descent that’s fast, technical, and challenging. This is where Mt. Wilson’s reputation for thrilling rides really shines. The trail features loose rock sections, tight switchbacks, steep drop-offs, and narrow ledges that will test even the most seasoned riders. You’ll need to stay sharp and focused, as one wrong move could mean a spill into some unforgiving terrain.
Stunning Views: One of the highlights of the climb is the spectacular view of the Los Angeles basin from the summit of Mt. Wilson. On clear days, you can see from downtown LA all the way to the Pacific Ocean, with the sprawling city and mountain ranges laid out beneath you. The vistas make for a perfect rest point before the challenging descent.
Varying Terrain: The Mt. Wilson Trail offers a diverse range of terrains, from smooth sections of hard-packed dirt to loose, rocky patches that require excellent bike control. Riders will navigate through forested areas, rocky ridges, and exposed ledges, all of which add to the trail’s challenging nature.
Pro Tips
Climbing Strategy: The 7-mile climb is a test of endurance, so pace yourself accordingly. It’s easy to burn out early if you push too hard at the beginning. Use your lowest gear, maintain a steady rhythm, and conserve energy for the technical descent. Break the climb into sections and focus on completing each part rather than thinking about the total elevation.
Technical Descent Preparation: The descent is not just about speed; it’s about control. Make sure your bike is properly set up for technical riding. A full-suspension setup with at least 150mm of travel is ideal for absorbing the bumps and drops you’ll encounter. Check your brake pads before the ride, as you’ll be relying on them heavily during the descent.
Mind the Switchbacks: The switchbacks on the descent are tight and steep, requiring sharp bike-handling skills. Approach them slowly, control your speed, and use your body to shift weight and maneuver through these technical turns. A dropper post can be particularly helpful on these sections, allowing you to shift your weight back and maintain balance.
Best Time to Ride: While the trail is rideable year-round, the best times to tackle Mt. Wilson are during spring and fall when the temperatures are more moderate. Summer rides can be brutal due to the heat, and winter conditions can sometimes include snow or ice near the summit, making the descent hazardous.
Shuttle Options: Many riders take advantage of shuttle services to get to the summit and enjoy the thrilling descent without the grueling climb. If you prefer to skip the climb, consider using a shuttle, but keep in mind that it still requires advanced skills for the technical sections.
Rider Experience
Mt. Wilson Trail is a true test of endurance and technical riding ability, making it a must-ride for advanced mountain bikers in Southern California. The climb is long and challenging, but it rewards those who make it to the summit with breathtaking views and a descent that is fast, fun, and packed with technical obstacles.
6. Westridge Singletrack Loop – Santa Monica
Difficulty: Intermediate
Distance: 7.5 miles (loop)
Elevation Gain: Approx. 1,200 feet
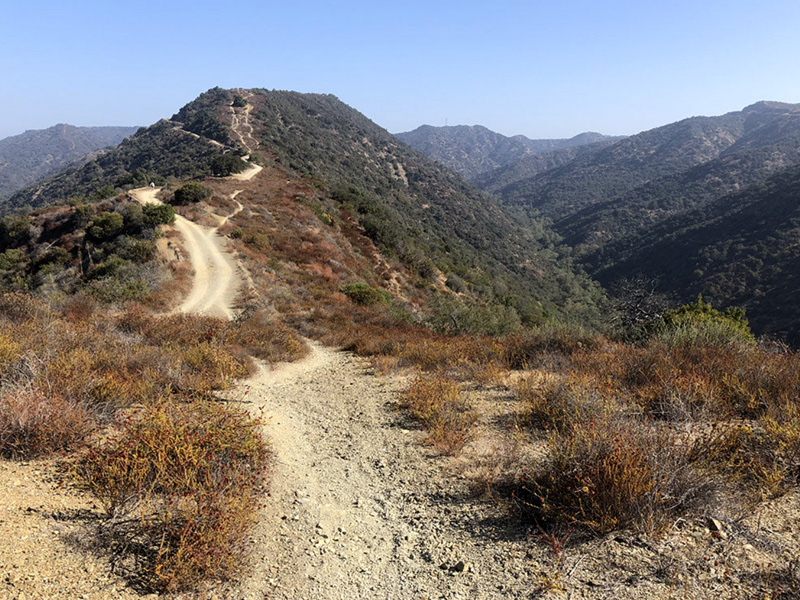
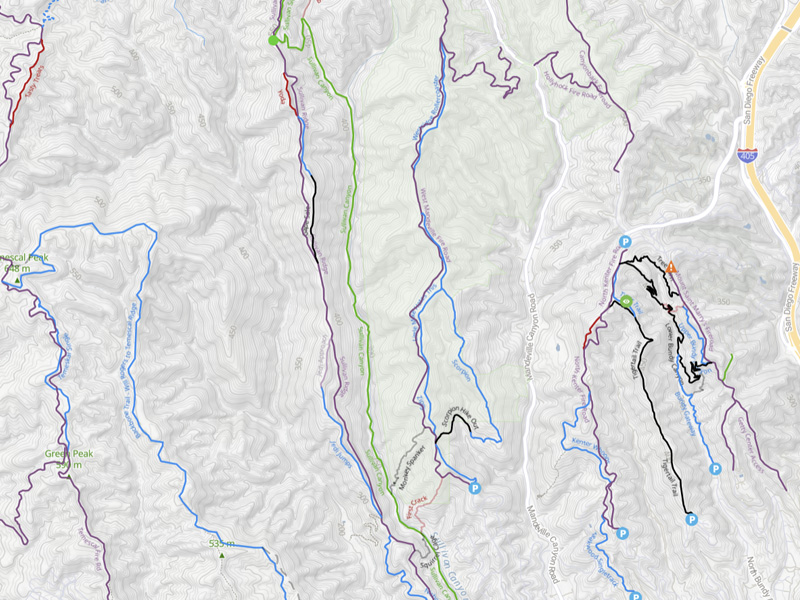
Trail Overview: The Westridge Singletrack Loop (Sullivan Canyon), located in the scenic Santa Monica Mountains, offers one of the best trail experiences for intermediate mountain bikers in Southern California. Spanning 7.5 miles, this loop is known for its beautiful mix of flowing singletrack, moderate climbs, and exhilarating descents, all with the backdrop of sweeping coastal and mountain views. It’s an ideal ride for those looking to escape the urban grind of Los Angeles and immerse themselves in nature without venturing too far from the city.
This trail is perfect for intermediate riders seeking a fun yet moderately challenging ride. The loop offers enough variety to keep things interesting without being overly technical, making it a great option for building fitness or enjoying a weekend escape. One of the highlights is the panoramic view of the Pacific Ocean, which you can enjoy from the ridgeline at the top of the trail.
What to Expect
Fast, Flowing Singletrack: One of the key draws of the Westridge Singletrack Loop is its fast and fun singletrack sections. While the trail offers some moderate climbs, the descents are where it really shines. These sections are smooth, flowy, and designed for speed, making them incredibly fun to ride. The twists and turns keep you engaged but aren’t overly technical, so intermediate riders can push their limits without feeling out of their depth.
Moderate Climbs with Rewarding Views: The climb to the top of the loop is gradual and steady, with an elevation gain of around 1,200 feet. It’s a solid workout but manageable for most intermediate riders. As you ascend, the views of the Santa Monica Mountains and the Pacific Ocean unfold, offering a rewarding visual experience that motivates you to keep climbing. Once you reach the top, the vista is absolutely stunning—on clear days, you can see the coastline stretching for miles.
Well-Maintained Trails: The Westridge Singletrack Loop is known for its well-maintained trails, making it an enjoyable ride year-round. The trail surface is a mix of packed dirt and small rocks, with the occasional loose section, but nothing too technical. The singletrack is narrow in parts, so you’ll need to stay alert, especially on the descents, but overall the trail is accessible and offers great flow for intermediate riders.
Escape from the City: Despite its proximity to Los Angeles, this trail feels surprisingly remote once you’re out riding. The loop is located in a relatively peaceful section of the Santa Monica Mountains, and you’ll find yourself surrounded by rolling hills, natural vegetation, and wildlife, giving you a true sense of escape from the busy city life. It’s the perfect blend of nature and adventure, just a short drive away from LA.
Pro Tips
Timing Your Ride for Optimal Conditions: If possible, try to ride early in the morning or late in the afternoon. The trail is exposed in many sections, and during the middle of the day, the sun can be intense—especially during the warmer months. Early rides not only provide cooler temperatures but also offer the best lighting for those incredible views at the top.
Know Your Limits on the Downhill: While the descents are fun and fast, they’re still singletrack, meaning the trail is narrow in some places and requires precise bike handling. There are a few loose sections, so control your speed and stay within your comfort zone. More experienced riders may want to pick up the pace, but less experienced riders should be cautious, especially on their first run down.
Parking and Access: The trailhead is conveniently located at Westridge Road, where there’s ample parking. It’s a popular trail, so on weekends it can get busy. Arriving early not only beats the crowds but also allows you to enjoy a peaceful ride without too much trail traffic.
Trail Etiquette: As a multi-use trail, you may encounter hikers and other bikers along the route, especially on weekends. Always yield to hikers and be mindful of your speed in more crowded sections. A friendly bell can help you alert others to your presence, especially on blind corners of the singletrack.
Rider Experience
The Westridge Singletrack Loop offers the perfect balance of challenge and fun for intermediate riders. The moderate climbs give you a solid workout, while the flowing downhill sections provide the excitement and adrenaline that make mountain biking so enjoyable. It’s an ideal trail for honing your skills—whether you’re working on climbing endurance or improving your flow on descents.
7. Los Peñasquitos Canyon – San Diego
Difficulty: Beginner to Intermediate
Distance: 12 miles (out-and-back)
Elevation Gain: Minimal (~300 feet)
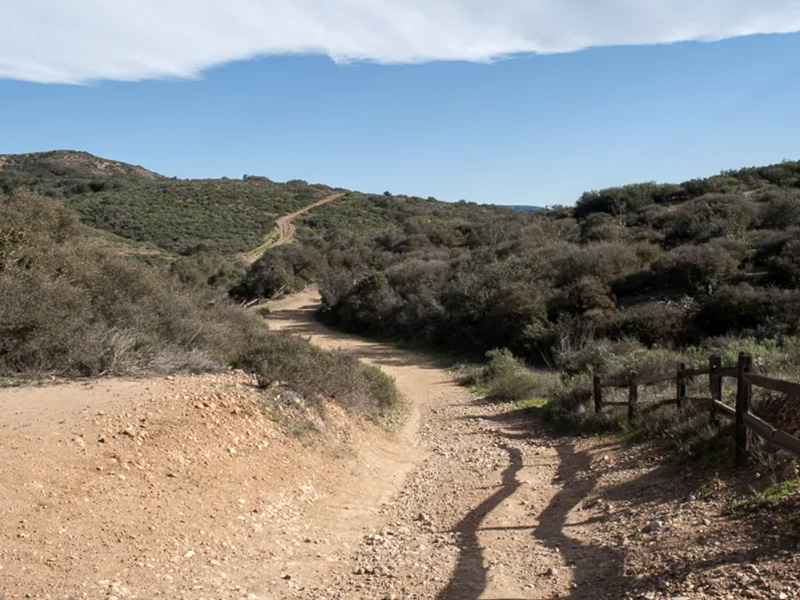
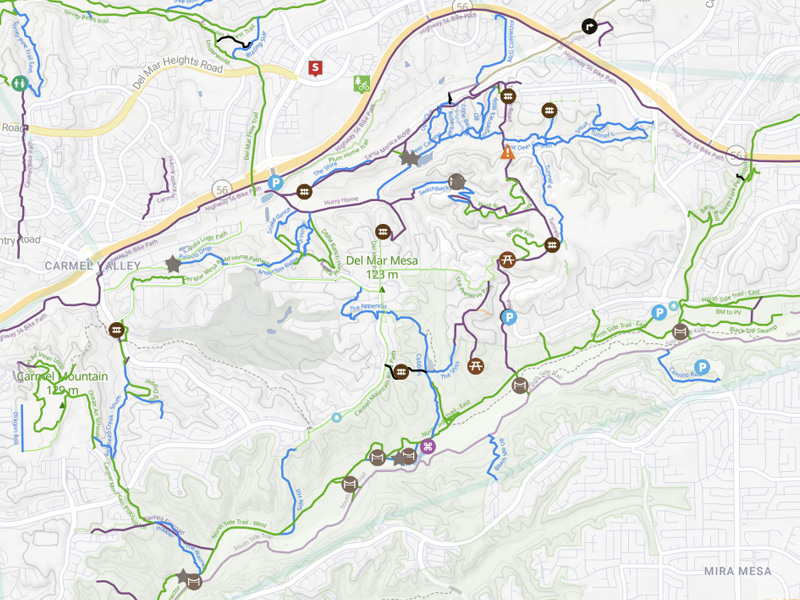
Trail Overview: Los Peñasquitos Canyon, located in the heart of San Diego, is a favorite among local riders for its accessibility and scenic beauty. Spanning 12 miles, this trail network offers a mix of wide-open fire roads, smooth rolling terrain, and sections of singletrack that cater to both beginner and intermediate mountain bikers. The relatively flat elevation and well-maintained paths make it an ideal spot for new riders, while the singletrack sections provide just enough technical challenge for those looking to test their skills.
The trail’s setting in Peñasquitos Canyon Preserve provides a beautiful natural backdrop with lush greenery, creeks, and waterfalls that make for a serene and peaceful ride. Whether you’re looking for a leisurely ride with friends or a slightly more adventurous route to hone your technical skills, Los Peñasquitos Canyon offers a surprisingly diverse range of terrain within a compact area.
What to Expect
Beginner-Friendly Terrain: The majority of the trail is composed of wide, smooth fire roads, making it ideal for beginners or families looking for a relaxing ride. The paths are relatively flat, with only a slight elevation gain of around 300 feet over the entire 12-mile stretch. New riders can feel comfortable navigating the terrain without having to worry about steep climbs or technical obstacles.
Challenging Singletrack for Intermediates: For intermediate riders, the trail offers pockets of singletrack that weave through the more technical sections of the canyon. These areas feature tight corners, rocky patches, and small drops, providing a fun challenge without being overly difficult. It’s a great place for intermediate riders to practice switchbacks, balance, and handling, especially if you’re still developing your technical skills.
Scenic Beauty and Nature: One of the best aspects of Los Peñasquitos Canyon is its natural beauty. As you ride through the preserve, you’ll pass through areas of lush vegetation, including sycamore and oak trees, wildflowers, and rolling hills. There are a few creeks and Peñasquitos Creek Waterfall, which is a perfect stop for a quick rest or photo opportunity. Wildlife is also abundant here—you may spot deer, hawks, and even the occasional bobcat, adding to the immersive experience.
Easy Accessibility and Well-Maintained Trails: The trail system is well-marked and maintained, making it easy to navigate. This is particularly helpful for beginners who might not be familiar with more technical trail systems. There are several access points and plenty of parking at the trailhead, making it convenient for those traveling from different parts of San Diego.
Pro Tips
Perfect for Beginner Rides and Family Outings: If you’re new to mountain biking or looking for a trail suitable for a family outing, Los Peñasquitos Canyon is ideal. The wide fire roads are great for less experienced riders, and there’s plenty of space to ride side by side. It’s an excellent trail for families with kids or groups looking for a more relaxed pace.
Explore the Singletrack Sections: While much of the trail is beginner-friendly, intermediate riders should definitely seek out the singletrack sections. These winding, narrower trails are where you’ll find more technical challenges, including rocky stretches, small ledges, and quick descents. These areas provide the opportunity to sharpen your bike-handling skills in a low-pressure environment, especially for riders who want to transition to more technical trails in the future.
Ride in the Morning for Cooler Temperatures: San Diego’s weather is mild, but it can still get warm in the canyon, especially during the middle of the day. To avoid the heat, it’s best to ride in the early morning or late afternoon when the temperatures are cooler. The morning hours also provide calm, peaceful conditions, making it easier to enjoy the natural surroundings.
Watch for Hikers and Other Riders: Los Peñasquitos Canyon is a popular multi-use trail, so expect to share the path with hikers, runners, and other bikers. The wide fire roads make passing easy, but be mindful of trail etiquette—always yield to hikers and slower riders. The singletrack sections are narrower, so control your speed and be prepared to stop when needed.
Bring Plenty of Water and Snacks: Despite the relatively flat terrain, the canyon can get quite warm, especially during the summer months. Bring plenty of water, as there are no water stations along the trail. Since it’s a longer trail, packing a few snacks is a good idea if you plan on riding the full 12-mile loop.
Wildlife Encounters: Keep an eye out for wildlife along the trail. Deer, rabbits, hawks, and even bobcats are known to frequent the area, particularly in the early morning and late afternoon. It’s not uncommon to see wildlife near the creek or in the more shaded sections of the trail, adding to the beauty and serenity of the ride.
Rider Experience
Los Peñasquitos Canyon is a perfect blend of accessibility and adventure, making it a great option for riders of all skill levels. Beginners will appreciate the smooth, wide paths and the chance to ride in a stunning natural environment, while more experienced riders can enjoy the challenge of the singletrack sections. The peaceful, scenic setting allows for a relaxing and enjoyable ride, making it a favorite spot for locals looking to unwind and connect with nature.
8. Tahoe Rim Trail – Lake Tahoe
Difficulty: Advanced
Distance: 22 miles (Point-to-point or loop options available)
Elevation Gain: Approximately 3,000 feet
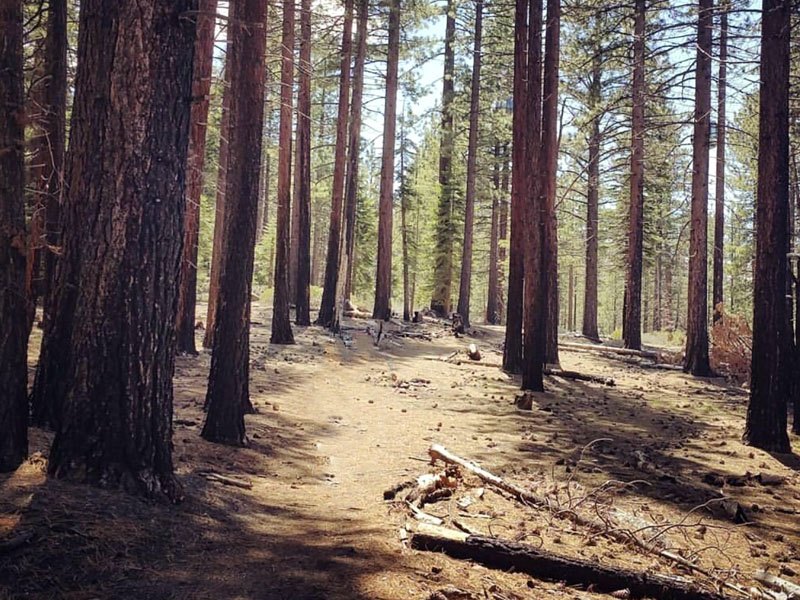
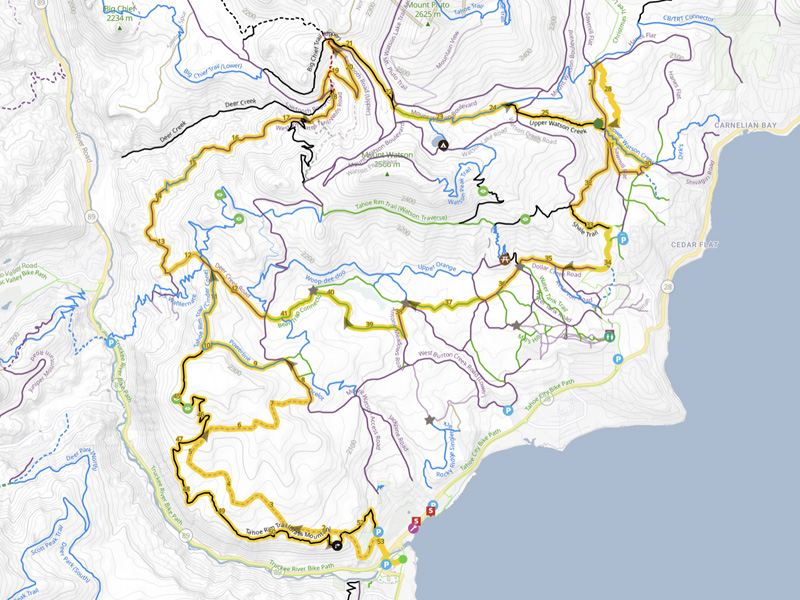
Trail Overview: The Tahoe Rim Trail (TRT) is not just a trail—it’s a true mountain biking adventure. Situated at high altitude in the majestic Lake Tahoe region, this 22-mile section is one of the most iconic rides in all of California. Known for its breathtaking alpine scenery, diverse terrain, and technical challenges, the Tahoe Rim Trail offers an unforgettable experience for advanced riders. The trail winds through forested areas, open alpine meadows, rocky ridges, and presents plenty of opportunities to take in panoramic views of Lake Tahoe and the surrounding Sierra Nevada mountains.
For advanced riders seeking a blend of challenging climbs, thrilling descents, and technical features—all while riding at high elevations—the Tahoe Rim Trail is a bucket-list ride that delivers on all fronts. This trail has earned its reputation as one of the top MTB destinations for good reason.
What to Expect
High-Elevation Riding: With an elevation gain of roughly 3,000 feet and sections that reach over 8,000 feet in altitude, the Tahoe Rim Trail requires endurance and adaptation to high-altitude conditions. Riders will notice thinner air, which means climbing can be more demanding than at lower elevations. It’s important to pace yourself, especially if you’re not accustomed to riding at such heights. Make sure to give yourself time to adjust, and be aware that weather can change quickly at higher elevations.
Varied Terrain for Advanced Riders: The Tahoe Rim Trail has something for every advanced rider, including steep climbs, rocky descents, and flowy singletrack. The trail transitions from smooth, fast-flowing sections through alpine meadows to challenging rock gardens and technical downhill runs through forested areas. Expect tight switchbacks, loose gravel, and exposed ridgelines, all of which demand precise bike handling and full concentration. It’s a true test of both fitness and technical skill, making it ideal for riders who love a challenge.
Scenic Highlights: One of the most rewarding aspects of this trail is the scenery. The trail hugs the ridgeline surrounding Lake Tahoe, offering uninterrupted, sweeping views of the brilliant blue lake below and the snow-capped Sierra Nevada mountains in the distance. Every turn reveals a new view, whether it’s across a meadow filled with wildflowers or a rocky outcrop overlooking the lake. Riders will want to stop frequently for photos, not only to capture the beauty but also to catch their breath on this challenging ride.
Alpine Meadows and Forest Sections: As you traverse the trail, you’ll encounter a diverse range of environments. The ride begins with alpine meadows that feel open and expansive, before winding into dense pine forests, where the trail becomes more technical. The trail surfaces vary, with some sections offering smooth, packed dirt, while others challenge riders with loose rocks and roots that require constant attention.
Rocky, Technical Descents: The downhill sections on the Tahoe Rim Trail are thrilling but technical. You’ll need to be comfortable with handling rocky, uneven terrain at speed, as well as navigating sharp, tight switchbacks that demand precise control. These sections will keep your adrenaline pumping, and while they are difficult, they are incredibly rewarding for those who are up to the task. The trail also features some exposed areas along the ridgeline, so keeping control of your bike is essential.
Pro Tips
Acclimate to High Altitude: The Tahoe Rim Trail sits at high elevation, and riders not accustomed to these altitudes may experience altitude sickness or fatigue more quickly than expected. Arriving a day or two early to acclimate to the thinner air is highly recommended. Drink plenty of water, and take breaks as needed during the ride to avoid overexertion. Your body will need extra time to adjust, especially during the steep climbs.
Hydrate and Fuel: Hydration is critical when riding at high altitudes. Bring more water than you think you’ll need, as the elevation can dehydrate you faster than usual. A hydration pack with at least 2-3 liters of water is ideal. Pack energy bars or snacks, as this ride is long and demanding, requiring fuel to keep your energy levels up.
Use Full-Suspension Mountain Bikes: Given the rocky and technical nature of the descents, a full-suspension mountain bike is highly recommended. You’ll need the extra shock absorption for the rough, uneven sections, as well as the control and stability that comes with a full-suspension setup. Riders should ensure their bikes are in good condition, particularly the brakes, as they will be essential for navigating the steep downhill sections.
Plan Your Route: The Tahoe Rim Trail has several access points, and riders can choose between doing the full 22-mile section or breaking it up into smaller rides. If you’re not up for the full length, consider using a shuttle service to reach the top and ride the downhill sections. There are loop options that can take you back to your starting point, or you can plan a point-to-point ride with a pickup at the other end. Having a trail map or GPS is essential, as the terrain can be disorienting at times.
Be Prepared for Other Trail Users: The Tahoe Rim Trail is multi-use, so you may encounter hikers, backpackers, and equestrians. Make sure to be courteous and yield the trail to hikers and horses. A bike bell can be useful to alert others when approaching, especially in areas with tight, blind corners.
Prepare for a Full Day Adventure: This trail will take most riders a full day to complete, depending on fitness level and breaks. Pack enough supplies to last the day, including first-aid items, repair tools, and extra food. The trail’s remoteness means there are no facilities along the route, so plan accordingly.
Rider Experience
The Tahoe Rim Trail is a true test of endurance, skill, and grit, but the rewards are more than worth it. Advanced riders will relish the diverse terrain, the challenging climbs, and the technical descents that demand attention and precision. The ever-changing scenery, from open alpine meadows to dense forest and rocky ridges, makes this a dynamic ride that keeps you engaged and eager to see what’s around the next corner.
9. Nisene Marks and Soquel Demonstration Forest – Santa Cruz
Difficulty: Intermediate to Advanced
Distance: Varies (up to 20 miles or more, depending on the route)
Elevation Gain: 2,000+ feet in some sections
Trail Overview: The Soquel Demonstration Forest, located in the Santa Cruz Mountains, offer some of the most iconic singletrack trails in California. These two neighboring forests provide an exceptional experience for mountain bikers of intermediate to advanced skill levels, with trails that wind through majestic redwood groves, challenging technical sections, and fast-flowing descents. Each forest offers something unique, making this area a must-ride destination for riders seeking both adventure and natural beauty.
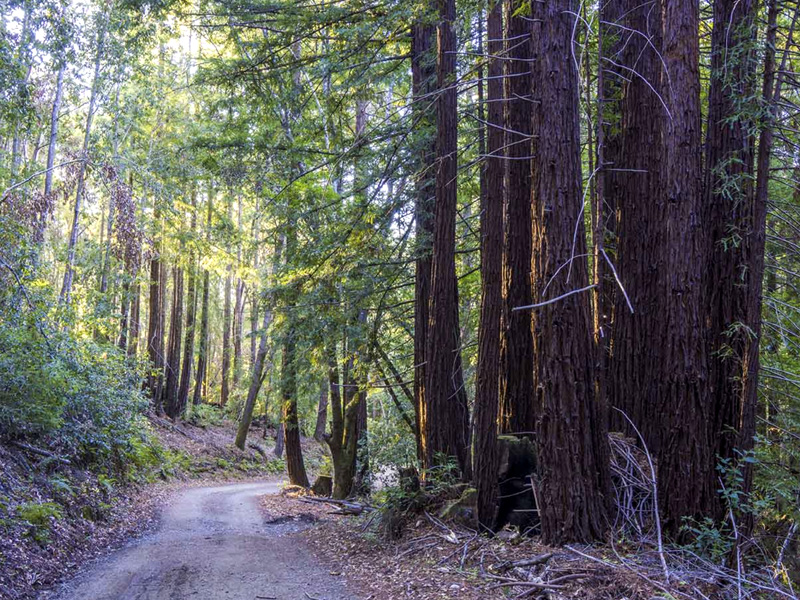
Nisene Marks delivers a more relaxed, scenic experience, with its towering redwoods and smooth, rolling singletrack. This forest is perfect for riders who want to immerse themselves in the tranquil beauty of nature while enjoying a ride that offers both fun and flow. In contrast, Soquel Demonstration Forest (often called “Demo”) is known for its technical challenges, jumps, berms, and steep descents—it’s the place to go if you’re looking for more of an adrenaline-fueled ride. Together, these two forests create an unmatched MTB experience.
What to Expect
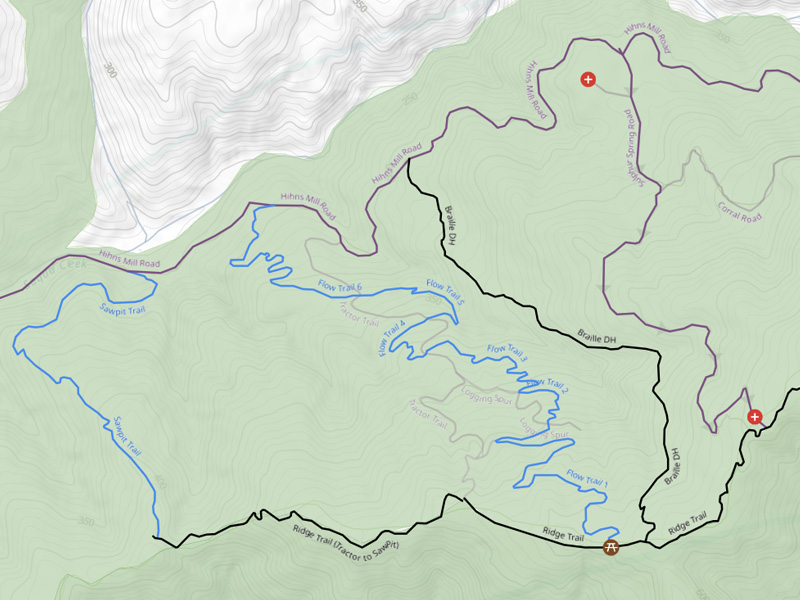
Soquel Demonstration Forest: Technical and Thrilling: If you’re looking for technical riding with a lot of flow, Soquel Demonstration Forest is where you want to be. The trails here are famous for their well-built berms, jumps, drops, and steep sections that challenge even experienced riders. Trails like Braille and Flow Trail are particularly popular, offering thrilling descents with perfectly sculpted berms and jumps that let you carve down the hillside with speed. Braille Trail offers a blend of technical rock gardens, root sections, and challenging drops, making it an advanced rider’s playground.
The Flow Trail, on the other hand, is smoother and designed for speed. It’s perfect for riders looking to work on their flow and cornering skills, with features that help you keep your momentum going through the twists and turns. Soquel Demo is a destination for riders who want a challenge, but it’s also well-suited for intermediate riders who are ready to take on more technical terrain in a progressive, supportive environment.
Forest of Nisene Marks: Scenic and Relaxing: In contrast, the Forest of Nisene Marks offers a more tranquil riding experience. This forest is filled with towering redwoods and lush, green landscapes, making for a more peaceful and scenic ride. The trails here are less technical than those in Soquel Demo, with smoother, flowing singletrack that’s ideal for intermediate riders. The atmosphere in Nisene Marks is calmer, allowing you to truly take in the beauty of the forest as you ride beneath the canopy of towering trees.
One of the most famous trails in Nisene Marks is Aptos Creek Fire Road, which offers a long, steady climb through the redwoods. It’s a great way to build endurance while enjoying the incredible scenery. Once you’ve reached the summit, the descent is smooth and flowing, making it a fun, relaxing ride through one of California’s most picturesque forests.
Lush Redwood Forests and Scenic Views: Both forests are famous for their stunning redwood landscapes. Riding through these towering trees offers an experience that’s not only physically rewarding but also mentally rejuvenating. The scenery in both forests is breathtaking, with lush ferns, moss-covered trees, and plenty of shaded areas that make even the toughest climbs more enjoyable.
Pro Tips
Choose the Right Trail for Your Skill Level: If you’re an intermediate rider looking to take it easy and enjoy a scenic ride, start with the Forest of Nisene Marks. Its smoother, less technical trails allow for a more relaxed experience while still offering plenty of fun. If you’re feeling confident and want to step up your game, head over to Soquel Demonstration Forest to try trails like Braille or Flow Trail, which provide a mix of technical features and flowing sections.
Bring a Full-Suspension Bike: The trails in Soquel Demonstration Forest are best tackled on a full-suspension bike, especially if you plan on riding Braille or Flow Trail. The rough, technical descents and jumps are much easier to handle with full suspension, giving you better control and comfort on the trail. For Nisene Marks, a hardtail could work, but full suspension still provides extra cushioning on the longer rides.
Parking and Trail Access: Both forests have parking areas, but Soquel Demonstration Forest requires a bit of a ride-in before you get to the main trails. The parking at Aptos Creek Road in Nisene Marks is more convenient if you want a shorter, more accessible ride. Always check the parking fees and trail access conditions before heading out, as they can vary depending on the time of year.
Know Your Limits: Soquel Demo has some trails that are definitely more advanced, so know your limits before diving into technical features like rock drops or jumps. If you’re feeling uncertain, start with Flow Trail, which is designed for a smoother, faster ride with fewer technical obstacles, but still offers the thrills of speed and berms. Braille, on the other hand, demands more focus and skill, so intermediate riders may want to progress there gradually.
Rider Experience
Whether you’re looking for the technical challenges of Soquel Demonstration Forest or the scenic serenity of Nisene Marks, both forests offer something special for mountain bikers of all skill levels. The combination of lush redwood scenery, smooth singletrack, and more technical descents make these trails a must-ride for anyone in the Santa Cruz area. For intermediate riders looking to improve their technical skills, Demo Forest offers the perfect training ground, while advanced riders will find plenty of adrenaline-pumping features to test their abilities. Meanwhile, Nisene Marks provides a more relaxed, scenic experience that’s perfect for riders who want to enjoy the beauty of the redwoods while still getting in a great workout.
10. Camp Tamarancho – Marin County
Difficulty: Intermediate
Distance: 9 miles (loop)
Elevation Gain: Approx. 1,200 feet
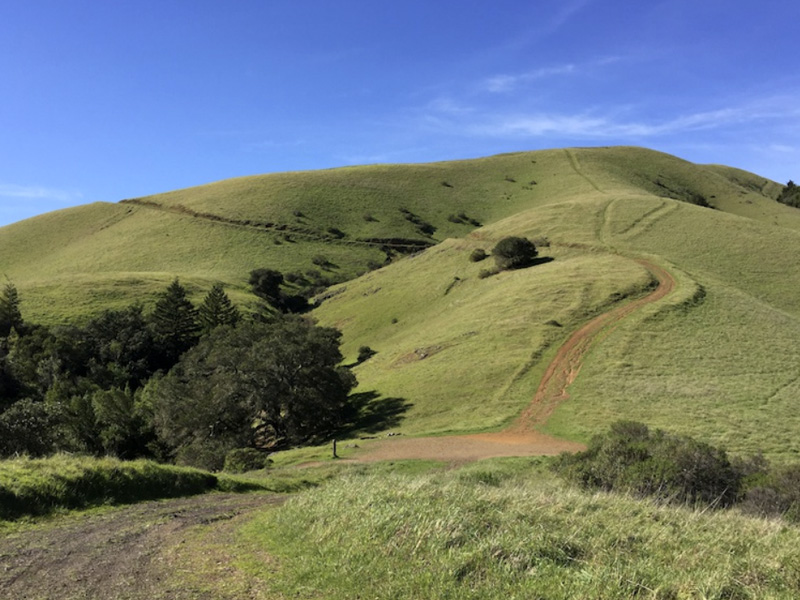
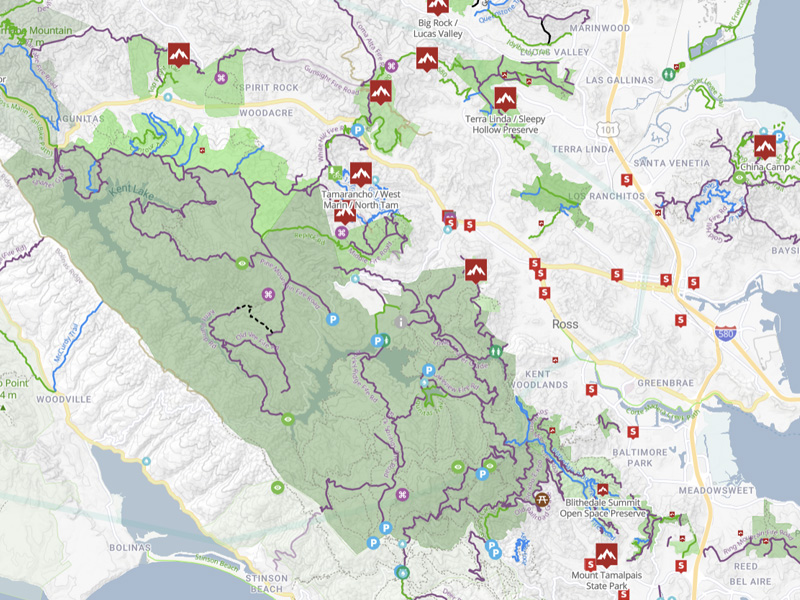
Trail Overview: Nestled in the hills of Marin County, Camp Tamarancho is often referred to as a hidden gem for mountain bikers in Northern California. Offering a 9-mile loop of some of the most well-maintained singletrack in the region, this trail is a dream for intermediate riders looking to hone their skills and enjoy a day out on the bike. The loop is known for its beautiful mix of flowy descents, technical rock gardens, and moderate climbs, giving riders a well-rounded experience that’s challenging but not overwhelming.
One of the key highlights at Camp Tamarancho is the famous “Flow Trail,” a fast, swooping descent that’s packed with well-built berms, jumps, and rollers. This section alone is enough to put a huge grin on any rider’s face, as it combines speed with fun, playful features that make for an exhilarating ride. With its varied terrain and well-designed features, Camp Tamarancho is an excellent trail for intermediate riders who want to push their limits while having a blast on the bike.
What to Expect
Flawless Singletrack: The singletrack at Camp Tamarancho is smooth, well-maintained, and meticulously built, making it one of the best trails for flow in Marin County. The trail weaves through dense forest, offering plenty of shade on hot days, and transitions between fast, flowy sections and more technical terrain with rock gardens and rooty sections that keep you on your toes. The mix of terrain means you’ll need a variety of skills, but nothing too extreme for the average intermediate rider.
The Flow Trail: One of the most popular features of Camp Tamarancho is its Flow Trail. This is a must-ride section, as it features perfectly sculpted berms, smooth jumps, and roller sections that let you carry speed effortlessly. The trail is designed for flow, meaning you won’t need to constantly pedal to keep your momentum. Intermediate riders will love how the trail is fun and playful, but also forgiving enough for those still working on their skills. If you’re looking to experience the joy of speed and smooth descents, this is the place.
Technical Rock Gardens: While the Flow Trail is all about fun, other sections of the loop at Camp Tamarancho challenge riders with technical rock gardens and rooty sections. These areas require precise bike handling and line choice, but are manageable for most intermediate riders. It’s a great spot to practice your technical skills without feeling out of your depth. The rock gardens are well-placed, breaking up the flow and adding variety to the trail.
Gradual Climbs with Rewards: The climbs at Camp Tamarancho are mostly moderate and spread out, which means you won’t be hitting any brutal ascents, but you’ll still get a good workout. The total elevation gain is around 1,200 feet, but the climbs are gradual and well-paced, allowing you to enjoy the ride without feeling too fatigued. Best of all, each climb is followed by a rewarding descent, which makes the effort feel worthwhile. The trail’s design ensures that there’s always something fun waiting for you at the top.
Stunning Marin Scenery: As you ride through Camp Tamarancho, you’ll be treated to gorgeous views of Marin County, with dense forests, rolling hills, and occasional open vistas. The scenery adds to the overall enjoyment of the ride, offering a peaceful escape from the urban bustle of nearby San Francisco. The natural beauty of the area, combined with the well-built trails, makes this one of the most enjoyable spots for mountain biking in Northern California.
Pro Tips
Get a Permit: Unlike many other trails, Camp Tamarancho requires a trail permit to ride. You can purchase a day pass for a small fee or get an annual permit if you plan on riding the trail frequently. The permit system helps maintain the trail’s excellent condition, so it’s worth the small cost. Make sure to grab your permit online or at a local bike shop before heading out.
Bring Your Full-Suspension Bike: While the Flow Trail is smooth and fast, the more technical sections of Camp Tamarancho feature rock gardens, roots, and uneven terrain, making it ideal for a full-suspension bike. The extra suspension will help you glide through the rougher parts of the trail and keep you comfortable on the descents.
Time Your Ride for Weekdays or Early Mornings: Camp Tamarancho is a popular spot, especially on weekends, so if you want to enjoy the trail without too much traffic, try to visit on a weekday or early in the morning. This will give you a more peaceful ride and allow you to fully enjoy the Flow Trail without having to wait for other riders.
Flow Trail Tips: When riding the Flow Trail, let your bike carry momentum and try to focus on maintaining your speed through the berms and rollers. The trail is designed to let you flow effortlessly, so don’t overthink it—just lean into the corners, keep your weight balanced, and enjoy the ride! Even though the jumps are fun, they’re optional, so feel free to ride around them if you’re not feeling confident.
Work on Your Skills: The great thing about Camp Tamarancho is that it’s a perfect place to practice and improve your mountain biking skills. Whether you want to work on cornering, handling rock gardens, or riding jumps, this trail offers it all. Intermediate riders can use this trail to push their limits while still staying within their comfort zone.
Parking and Trail Access: The main parking area for Camp Tamarancho is located near Iron Springs Road. There’s usually plenty of parking, but on busy weekends it can fill up. The trailhead is well-marked, and from the moment you start, you’re immersed in the natural beauty and flowing trails that make this area special.
Rider Experience
Camp Tamarancho offers a near-perfect balance of fun, flow, and technical challenge, making it a standout destination for intermediate mountain bikers. The well-maintained singletrack provides smooth, fast sections that are incredibly fun to ride, while the rock gardens and rooty sections add enough challenge to keep things interesting. For those who love flowy descents, the Flow Trail will be the highlight of the loop, delivering a thrilling, playful ride that you’ll want to repeat over and over.
Why Riders Love These Trails
Each trail on this list offers something special for mountain bikers of all skill levels, from the heart-pounding descents of Downieville to the tranquil redwoods of Santa Cruz. Whether you’re tackling the rocky terrain of Lake Tahoe or cruising the flowing singletrack at Camp Tamarancho, these trails promise an unforgettable riding experience.
Shoutout to California MTB Teams
A big shoutout to all the MTB teams and clubs across California that ride these incredible trails and have trusted Nightfox as their supplier for custom jerseys since 2012. Your dedication to the sport and passion for exploring new routes keeps the MTB community thriving, and we’re proud to be part of your journey.
So, there you have it—the ultimate guide to the top MTB trails in California! Ready to ride? Grab your gear, hit these amazing trails, and experience everything California’s mountain biking scene has to offer!


Get Social